

By Niels Eriksson and Sara Golob
You are about to embark on an adventure to create your very own RPG. This Unity project will provide you with brief introductions to many important game development topics. In this project you will be following a set of 9 tutorials each covering a different topic that is crucial to creating an RPG but that can also be used in a variety of other game genres. In the figure below you can see all the topics you will learn and challenge yourself with.
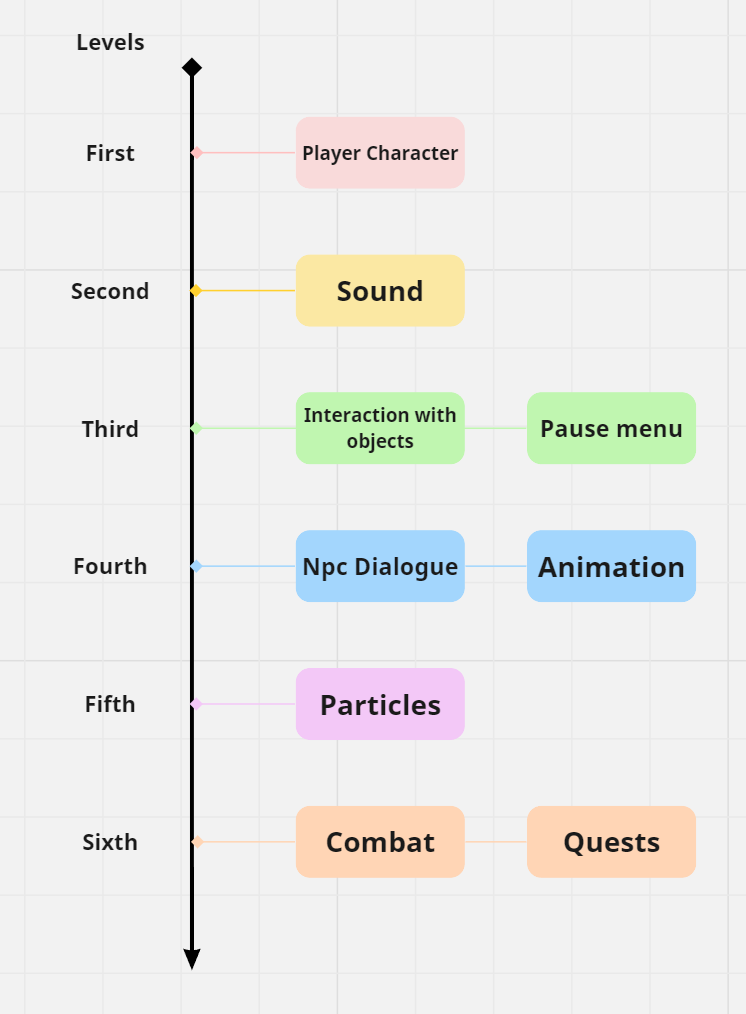
These topics are meant to be followed in chronological order but as some students are more experienced than others we have provided you with a starting point to each tutorial which has everything previous tutorials have covered, allowing you to by-pass topics you already are familiar with. And as you can see sometimes there are two different topics at the same “Level”, this implies that you have the freedom of choosing which of the two you would like to learn first. If you are a beginner to Unity, we strongly encourage you not to hop over any topic and go through them all one by one for the best possible learning experience.
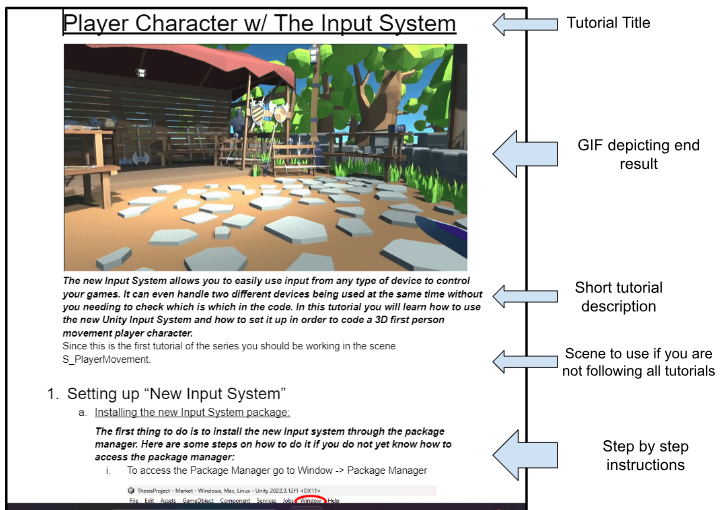
Structure of the Tutorials
Each tutorial is ended by a “Challenge Yourself” section which depicts more advanced or different usages of the knowledge you acquired that we believe will be useful for you to try out on your own.
Downloading the Project
- Download Unity Hub and run the program.
- Install Unity 2022.3.12 version (Downloadable at this link Unity Download Archive)
- Create a github account following the instructions in this link : Creating an account on GitHub. OR Log in to your existing account : Sign in to GitHub
- Download GitHub Desktop.
- Head over to the project’s GitHub repository webpage: GitHub
- Clone the repository onto your computer following the steps in this link: Cloning a repository from GitHub to GitHub Desktop.
- Open the newly cloned project in Unity using the instruction in this link : How do I add a project saved on my computer into the Unity Hub? (ignore “Symptoms” and “Cause”)
An easy way to get your repository is to click on “Show in Explorer” in Git Desktop and copy the directory from there.

Structure of the Project
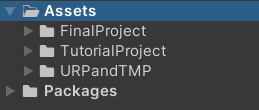
- “FinalProject” is a folder you would ideally not look in too much but can be used as a guideline/lifeline if you ever get stuck on a particular tutorial. It contains all prefabs in their final form, all written and commented scripts for you to compare with and scenes for all tutorials in their completed form. The scene F_Final can also be used if you do not wish to follow the tutorials and simply want a well structured and basic starting point to a RPG development. All files in this folder contain the prefix F_ standing for Final.
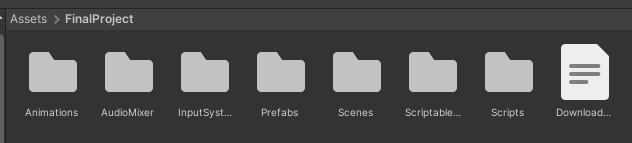
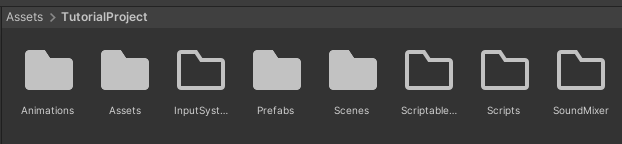
- “TutorialProject” is a folder that contains all starting elements, folders, scripts and prefabs that you will make use of when following the tutorials. This is going to be the folder in which you will work and save all your progress. The sub-folder “Scenes” also contains starting point scenes for each of the individual tutorials. These scenes should be used if you are choosing to bypass a portion of the tutorials. Which scene should be used for which tutorial will always be written in the instructions.The “Prefabs” folder contains all prefabs that you will use and build upon during your learnings. All files in this folder contain the prefix S_ standing for Start.
Getting started
The first topic you will learn is “Player Character w/ The Input System” in which you will learn how to set up a 1st Person player character and implement its movement using the Unity Input System. Here is the link to this tutorial : 1. Player Character w/ The Input System.
All other tutorials can be found in the following google folder : ThesisProjectTutorials